Equipment:
12 inch metal ruler
A cheap paint brush
A permanent marker
A knife
A few containers for mixing glue and/or paint
A bottle of elmers glue
Two different tones of brown acrylic craft paint ($1.50 each)
One package of Dark Cork Tiles (12 inches by 12 inches) ($9.99 at Hobby Lobby)
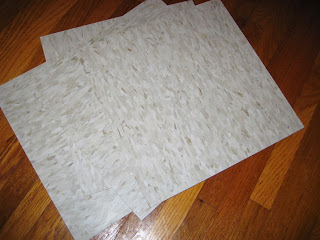
4x Armstrong's 1/8 inch thick commercial vinyl flooring tiles (12 inches by 12 inches) ($0.63 each Menards)
A pencil
A piece of graph paper.
Some ballast, sand, grit etc
These are the vinyl tiles:
Step 1. Design the tiles on graph paper. I was designing this for 15mm, so I decided to use a 1 inch grid. On each tile edge I nominated squares 3, 6&7, and 10 as potential passage ways, and each edge has an opening at at least two of these locations. This creates at least one open passage between adjacent tiles in any combination. The center passages were two space wide to make corridors for larger based figures.
The Master Plan:
The key to keeping it modular is to make sure that your transitions line up at the same point on the grid on all four sides.
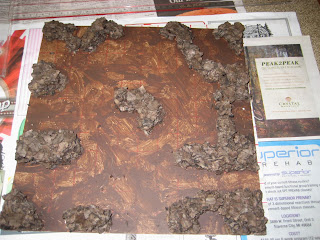
Step 2. Once I had a plan, I used a ruler and marker to draw a grid onto the flooring tiles. I then painted the grid squares where the walls would be with a base coat of the darker paint. I over painted the edges generously so that when I glued the walls down, I wouldn't have to go back and try to get paint under the edge of all of those irregular shaped walls.
Here is one of the layouts, the X's are to remind me where the walls will be.
Here is the with where the walls go painted:
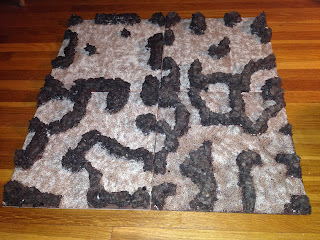
Step 3 - Building the walls. Next I cut the walls out of the cork. I used a knife to keep the edges clean along the corners, so that when pressed against other tiles, they come together nicely. I also was careful to keep all of the openings and passage ways at least one complete grid square open so that you don't end up with passage that you can't fit a base through. Otherwise I wasn't to careful and mostly broke the cork with my hands. I would do one tile, then other three, before coming back to the first after the glue dried to make another layer. I ended up using three layers of cork for all the walls to make them a little taller then a 15mm human.
Here is the first layer of cork walls:
Step 4: After the walls were glued into place, I went and painted all the tiles. When the paint dried I used a 50/50 mix of elmers glue and water, brushed on all the passage ways, and sprinkled it with two different size and color ballast/sand. First the large diameter, then the smaller. After that dried I shook off the extra ballast, and dab with a 50/50 mix of glue and water again.
Step 5. Okay, that's just about it. I then painted the cork with the darker brown, and when it dried dry-brushed it with the lighter brown. Then I covered the whole thing in another layer of 50/50 glue water mix to seal it good.
There it is! Hope it helps. It has a lot of narrow passages and choke points, so it should be interesting.


No comments:
Post a Comment